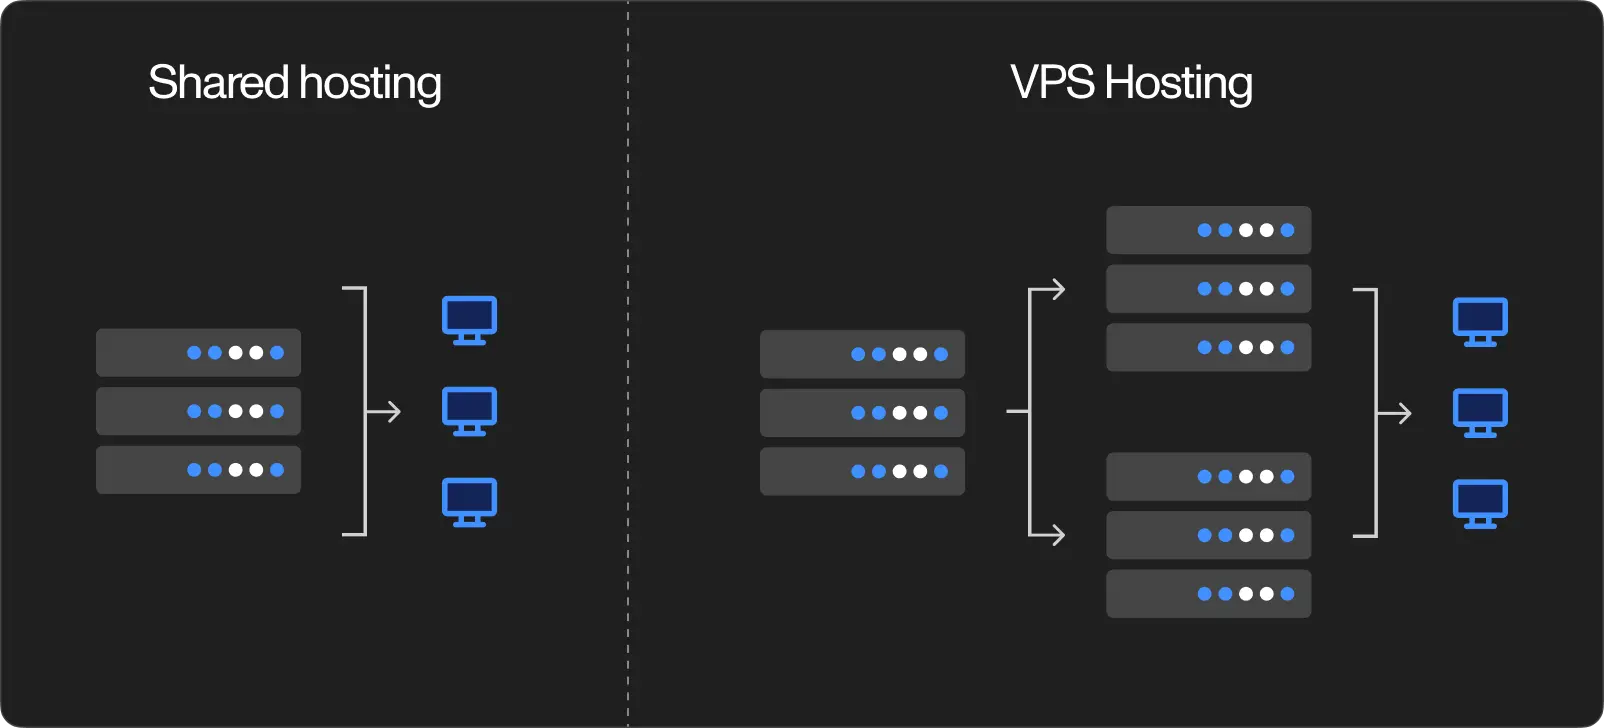
Shared hosting carries you until the first real traffic spike. Then the cracks show: slow response times, no SSH access, a control panel that hides server config behind five menus. For a site that brings in revenue (bookings, leads, sales), those limitations cost money every week they persist.
This guide documents a real migration we performed for a client (referred to as XYZ throughout). The XYZ WordPress site moved from a shared hosting plan to a Hostinger VPS running CloudPanel, with a simultaneous domain change. We will cover VPS provisioning, CloudPanel setup, file and database transfer, URL replacement, SSL, server hardening, and redirecting the old domain. Every command and configuration block is pulled from the actual migration.
If you have done this kind of move before, skip to the section you need. If this is your first VPS migration, read front to back. The order matters.
Why move off shared hosting at all
The case for migration usually boils down to three pressure points. None of them are theoretical.
Resource ceilings are invisible until they bite. Shared hosting providers oversell hardware; that is how the economics work. Your site shares CPU and memory with dozens of other accounts on the same physical machine. When a neighbour's traffic spikes, your response time might jump from 400 ms to 3 seconds. You will not get a warning. On a VPS, the allocated resources are yours alone. Even a modest KVM 1 plan (1 CPU, 4 GB RAM, 50 GB disk) comfortably handles a mid-size WordPress site with caching enabled.
Server-level control simply does not exist on shared plans. Want to configure Nginx? Not possible. Need to toggle Varnish, bump PHP memory limits, or install a system package? Also not possible. On a VPS with CloudPanel, every layer of the stack is exposed: OS, web server vhosts, PHP-FPM pools, database config. You decide what runs and how.
Cost scales better than most people expect. A cPanel license alone runs $15–20 per month. CloudPanel is free. A Hostinger VPS KVM 1 plan costs less than most premium shared plans, and it ships with root access. The math shifts in your favour the moment you stop paying for a control panel you have outgrown.
There are valid reasons to stay on shared hosting: you have a low-traffic blog, you want zero server maintenance, or the site is temporary. But once the site earns money or serves real customers, the migration pays for itself within a month.
Choosing a control panel
When you order a VPS from Hostinger (or any provider), the first real decision after picking the OS is which control panel to install. Skip this step and you are managing everything through the command line. Fine if you enjoy that, painful if you do not. Here is the field in 2026:
CloudPanel runs on Nginx, ships with a modern UI, and costs nothing. It handles WordPress site creation, SSL provisioning, Varnish caching, and file management from one interface. It is lightweight, noticeably less resource-hungry than the alternatives. This is what we used for the XYZ migration and what we recommend for most WordPress-on-VPS setups.
Virtualmin/Webmin is Hostinger's default suggestion in their VPS tutorials. It installs a full LAMP stack (Apache, MySQL, PHP) and includes email server support through ClamAV and SpamAssassin. The trade-off: heavier on resources, and the interface feels dated. Pick Virtualmin if you need email hosting on the same VPS.
cPanel is the panel most people recognize from shared hosting. Familiar does not mean optimal. The monthly license fee adds up, and the resource overhead is meaningful on a small VPS.
CyberPanel runs on OpenLiteSpeed and performs well, but the ecosystem is smaller and documentation thinner.
For this migration, we installed Ubuntu 24.04 with CloudPanel through Hostinger's OS selection screen. The process wipes the VPS clean (expected, since we are starting fresh) and takes a few minutes. After installation, the CloudPanel login credentials appear in the Hostinger panel under OS & Panel.
Step-by-step migration
1. Create the WordPress site in CloudPanel
Open CloudPanel at https://<your-vps-ip>:8443. Click Add Site → Create a WordPress Site and fill in:
- Domain name:
xyz.com(your new production domain) - Site title: whatever fits the project
- Site user and password: this controls SSH and SFTP access to the site's files
- Admin user and password: this is the WordPress admin login. Do not use "admin" as the username
- Admin email: a real address you monitor
Click Create. CloudPanel provisions the Nginx vhost, the MySQL database, and a fresh WordPress install in one step.
2. Point DNS to the VPS
Go to your domain registrar's DNS management panel and update (or create) two A records:
| Type | Host | Value |
|---|---|---|
| A | @ | <your-vps-ip> |
| A | www | <your-vps-ip> |
If a www CNAME record already exists, delete it first. A and CNAME records on the same subdomain conflict. DNS propagation usually takes 15 minutes to 2 hours. Verify with dig xyz.com +short from your terminal.
3. Generate backups on the old host
On the shared hosting control panel (Hostinger hPanel, cPanel, or equivalent), go to Backups and download two things:
- Files backup, the entire
public_htmldirectory as a zip archive - Database backup, an SQL dump of the WordPress database
For the XYZ site, the files archive was approximately 1.78 GB and the database dump was 133 MB. Large media libraries push the file backup higher; that is normal.
4. Transfer files to the VPS
Before uploading anything, save the fresh wp-config.php that CloudPanel generated. You need the database credentials from this file later.
cp /home/xyzuser/htdocs/xyz.com/wp-config.php /tmp/wp-config-new.php
Upload the files archive through CloudPanel's File Manager (Sites → Manage → File Manager) or via SFTP. Place it in a temporary location and extract:
cd /home/xyzuser/htdocs/xyz.com/
unzip -o /tmp/public_html.zip
The -o flag overwrites existing files without prompting. This replaces the default WordPress install with the actual site files from the old host.
Now restore the CloudPanel-generated wp-config.php so the site connects to the correct local database:
cp /tmp/wp-config-new.php /home/xyzuser/htdocs/xyz.com/wp-config.php
Fix file ownership so Nginx and PHP-FPM read everything correctly:
chown -R xyzuser:xyzuser /home/xyzuser/htdocs/xyz.com/
5. Import the database
Upload the SQL dump to /tmp/ on the VPS, then import it through the MySQL CLI:
mysql -u xyz_dbuser -p xyz_database < /tmp/backup.sql
When prompted for the password, use the database credentials from CloudPanel (Sites → Manage → Databases). This replaces the empty WordPress tables with the full production data from the old host.
6. Force the new domain in wp-config.php
The imported database still contains the old domain in the siteurl and home options. Override them by editing wp-config.php:
nano /home/xyzuser/htdocs/xyz.com/wp-config.php
Add these two lines before the /* That's all, stop editing! */ comment:
define('WP_HOME', 'https://xyz.com');
define('WP_SITEURL', 'https://xyz.com');
Save and exit. You should now be able to reach https://xyz.com/wp-admin and log in with the credentials from the old site.
7. Search and replace old URLs
Install the Better Search Replace plugin from the WordPress plugin repository (Plugins → Add New → search "Better Search Replace"). This plugin runs find-and-replace operations directly on the database. It is the safest way to update serialized data without breaking it.
Go to Tools → Better Search Replace and run these replacements one at a time, selecting all database tables for each:
| Search for | Replace with |
|---|---|
https://old-domain.com | https://xyz.com |
http://old-domain.com | https://xyz.com |
http://xyz.com | https://xyz.com |
Run each replacement as a dry run first. The plugin reports how many fields would change. When the numbers look reasonable, uncheck the dry run option and run the actual replacement.
If the old site used a staging URL or localhost path at any point, add those as separate search-and-replace passes as well. Stale URLs in serialized widget data and page builder content (Elementor, WPBakery) are the most common source of post-migration broken layouts.
After the URL replacement:
- If the site uses Elementor: go to Elementor → Tools → Regenerate CSS & Data
- Go to Settings → Permalinks and click Save Changes without modifying anything. This flushes the rewrite rules
8. Install the SSL certificate
In CloudPanel, go to Sites → Manage → SSL/TLS and click Actions → New Let's Encrypt Certificate. Add both xyz.com and www.xyz.com, then click Create and Install.
Let's Encrypt certificates auto-renew through CloudPanel's built-in cron job. No manual intervention needed after the initial setup.
9. Lock down the server
A fresh VPS is exposed by default. At minimum, configure the firewall and enable automatic security updates.
Firewall (UFW):
ufw allow 22    # SSH
ufw allow 80    # HTTP
ufw allow 443   # HTTPS
ufw allow 8443  # CloudPanel admin
ufw enable
Automatic security patches:
apt install unattended-upgrades -y
dpkg-reconfigure -plow unattended-upgrades
Select Yes when prompted. This ensures critical OS-level patches apply without waiting for you to SSH in.
Snapshot the server. Before you touch anything else, go to Hostinger → VPS → Snapshots & Backups and create a snapshot. This gives you a rollback point if something breaks later.
10. Enable caching
Install WP-Optimize (or your preferred caching plugin) and enable page caching. This alone cuts server response time dramatically on a VPS that is not behind a CDN.
CloudPanel includes Varnish Cache as an option. It works, but it sometimes conflicts with WordPress plugins that set custom headers or cookies (WooCommerce, membership plugins, booking systems). Test thoroughly before enabling Varnish in production. Page caching at the plugin level is the safer starting point.
11. Redirect the old domain
This is the step people forget. It is also the step that tanks your search rankings if you skip it. If the old domain still has backlinks, indexed pages, or bookmarked URLs floating around the internet, you need a 301 redirect pointing everything to the new domain.
Here is the catch that tripped us up the first time: the old domain's DNS still points to the old shared hosting server, not your VPS. That means the redirect has to live on the shared hosting, not on the VPS.
Edit the .htaccess file in the root directory of the old shared hosting account and add this line at the very top, before the WordPress rewrite block:
Redirect 301 / https://xyz.com/
The full .htaccess should look like this:
Redirect 301 / https://xyz.com/

# BEGIN WordPress
<IfModule mod_rewrite.c>
RewriteEngine On
RewriteRule .* - [E=HTTP_AUTHORIZATION:%{HTTP:Authorization}]
RewriteBase /
RewriteRule ^index\.php$ - [L]
RewriteCond %{REQUEST_FILENAME} !-f
RewriteCond %{REQUEST_FILENAME} !-d
RewriteRule . /index.php [L]
</IfModule>
# END WordPress
Test in a browser. Visiting https://old-domain.com should land you on https://xyz.com/. If you created a static redirect site in CloudPanel for the old domain, delete it. Since DNS never pointed to the VPS, that CloudPanel site was never receiving traffic anyway.
Post-migration checklist
Do not cancel the old hosting plan immediately. Seriously, keep it alive for at least a week. Things surface slowly.
Walk through the entire site manually. Every page template. Every form submission. Every language toggle if the site is multilingual. This is the part most people skip, and it is where broken layouts and dead links hide. Pay special attention to booking or e-commerce flows. Hardcoded URLs in plugin settings and payment gateway return URLs are the usual culprits.
Change all passwords. WordPress admin, database user, SSH/SFTP, CloudPanel admin, all of them. The migration involved copying credentials between systems, pasting them into terminals, and uploading config files. Rotating everything now is not paranoia. It is basic hygiene.
Keep an eye on server resource usage in CloudPanel for the first week. If CPU or memory spikes under normal traffic levels, dig into the cause before the next traffic peak arrives.
What comes next
The whole migration is a one-afternoon job once you know the sequence. We clocked the XYZ migration at roughly four hours, including DNS propagation wait time. The payoff (full server control, better performance, lower monthly cost) compounds every month the site runs.
If your site has outgrown shared hosting and you have been putting off the move because the process looked uncertain, this guide should remove that uncertainty. The tools are free, the steps are repeatable, and the worst-case scenario is a snapshot restore away.